Improve User Experience and Web Performance with Blurhash Algorithm


Overview
We'll concentrate on one of these picture optimization techniques in this article: employing image placeholders. We'll show you how to use the BlurHash Algorithm method to make image placeholders in particular.
What is Image Placeholder
Page speed and user experience can be significantly impacted by having too many images in your app or by having images that are very huge and load slowly. In fact, one of the biggest factors in how quickly your program runs is definitely the use of graphics.
We can utilize placeholders for some of the images in an app instead of reducing the overall amount of images to lower the initial load of image files.
A placeholder image for an image is a fake image that the browser can load initially to serve as the real image while waiting for the real image to download. Because placeholders have a far smaller file size than the actual image they represent, they help improve page speed. Moreover, image placeholders might stop layout changes on websites.
What is BlurHash
By using the BlurHash algorithm to create a blurred version of the image, we can build a more aesthetically pleasing design for the image placeholder.
The procedure entails creating a string of characters that encode an erroneous representation of the image, the quantity of characters generated is based on the image quality.
You can provide the BlurHash string directly into the HTML of your website and have it decoded into the blurred image without having to search for and download an image file.
Your webpage will be more aesthetically pleasing and will load more quickly if you use this BlurHash string as an image placeholder.
How does BlurHash work?
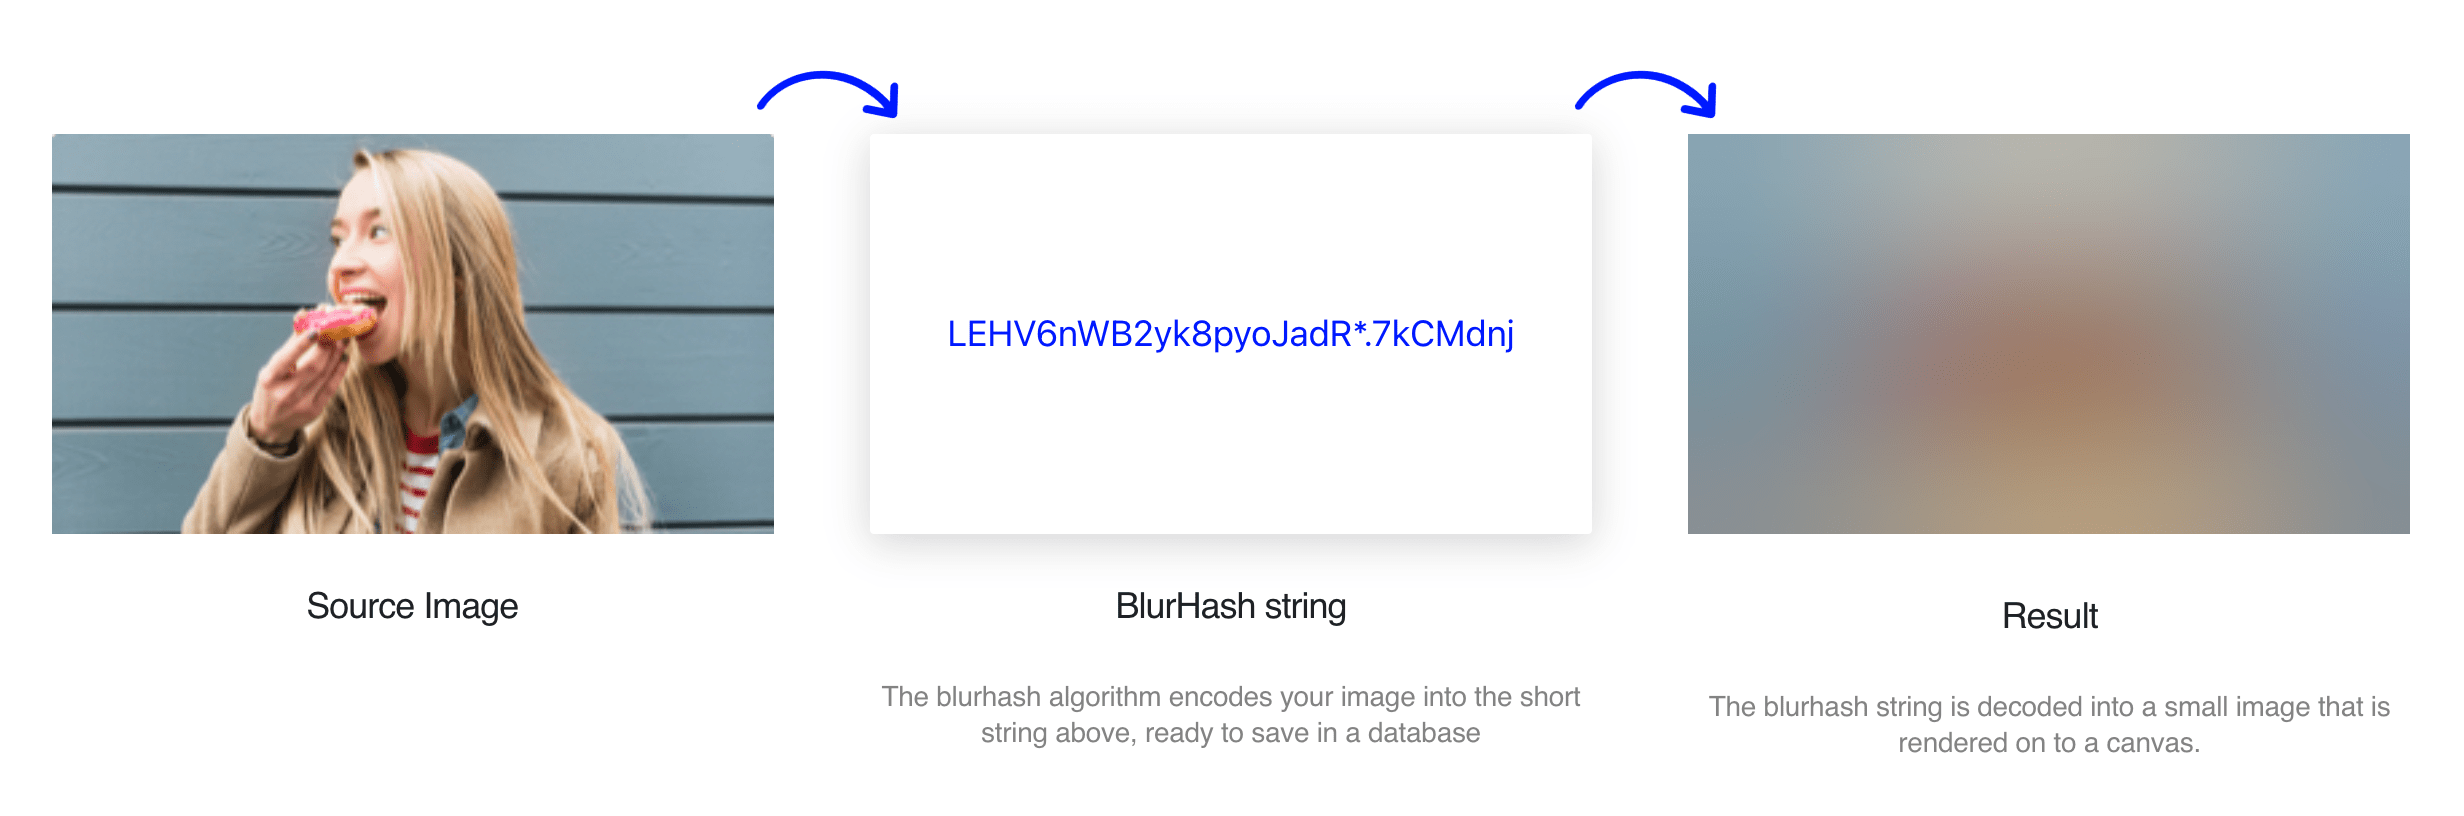 Illustration from bram.us
BlurHash applies a simple DCT transform to the image data, keeping only the first few components, and then encodes these components using a base 83 encoding, with a JSON, HTML and shell-safe character set. The DC component, which represents the average colour of the image, is stored exactly as an sRGB value, for easy use without implementing the full algorithm. The AC components are encoded lossily.
Structure of the BlurHash String
Here follows an example of a BlurHash string, with the different parts labelled:
Example: LlMF%n00%#MwS|WCWEM{R*bbWBbH
Legend:  12333344....................
-
Number of components, 1 digit.
For a BlurHash with
nxcomponents along the X axis andnycomponents along the Y axis, this is equal to(nx - 1) + (ny - 1) * 9. -
Maximum AC component value, 1 digit.
All AC components are scaled by this value. It represents a floating-point value of
(max + 1) / 166. -
Average colour. 4 digits.
The average colour of the image in sRGB space, encoded as a 24-bit RGB value, with R in the most significant position. This value can be used directly if you only want the average colour rather than the full DCT-encoded image.
-
AC components, 2 digits each,
nx * ny - 1components in total.The AC components of the DCT transform, ordered by increasing X first, then Y. They are encoded as three values for
R,GandB, each between 0 and 18. They are combined together asR * 19^2 + G * 19 + B, for a total range of 0 to 6859.Each value represents a floating-point value between -1 and 1. 0-8 represent negative values, 9 represents zero, and 10-18 represent positive values. Positive values are encoded as
((X - 9) / 9) ^ 2, while negative values are encoded as-((9 - X) / 9 ) ^ 2.^represents exponentiation. This value is then multiplied by the maximum AC component value, field 2 above.
Base 83 Encoding
A custom base 83 encoding is used. Values are encoded individually, using 1 to 4 digits, and concatenated together. Multiple-digit values are encoded in big-endian order, with the most significant digit first.
The character used set is
0123456789ABCDEFGHIJKLMNOPQRSTUVWXYZabcdefghijklmnopqrstuvwxyz#$%*+,-.:;=?@[]^_{|}~
Discrete Cosine Transform
To decode a single pixel of output, you loop over the DCT components and calculate a weighted sum of cosine functions. In
pseudocode, for a normalised pixel position x, y, with each coordinate ranging from 0 to 1, and components Cij ,
you calculate the following for each of R, G and B:
foreach j in 0 ... ny - 1
    foreach i in 0 ... nx - 1
        value = value + Cij * cos(x * i * pi) * cos(y * j * pi)
The C00 component is the DC component, while the others are the AC components. The DC component must first be converted
from sRGB to linear RGB space. AC components are already linear.
Once the R, G and B values have been calculated, they must be converted from linear to your output colourspace, usually sRGB.
Blurhash Implementation in Next.js
For dynamic images in a Next.js app, add the placeholder attribute with 'blur' as value, and you’ll also have to use the blurDataUrl attribute. This attribute takes in the image’s data URL decoded from the encoded blurhash string.
import Image from "next/image";

…

const featuredWorks = [
    ...,
    {
      img: "/static/images/projects/featured/buka.png",
      imgBlur:"data:image/jpeg;base64,/9j/4AAQSkZJRgABAQAASABIAAD/4QBMRXhpZgAATU0AKgAAAAgAAYdpAAQAAAABAAAAGgAAAAAAA6ABAAMAAAABAAEAAKACAAQAAAABAAAAmKADAAQAAAABAAAAmwAAAAD/7QA4UGhvdG9zaG9wIDMuMAA4QklNBAQAAAAAAAA4QklNBCUAAAAAABDUHYzZjwCyBOmACZjs+EJ+/8AAEQgAmwCYAwEiAAIRAQMRAf/EAB8AAAEFAQEBAQEBAAAAAAAAAAABAgMEBQYHCAkKC//EALUQAAIBAwMCBAMFBQQEAAABfQECAwAEEQUSITFBBhNRYQcicRQygZGhCCNCscEVUtHwJDNicoIJChYXGBkaJSYnKCkqNDU2Nzg5OkNERUZHSElKU1RVVldYWVpjZGVmZ2hpanN0dXZ3eHl6g4SFhoeIiYqSk5SVlpeYmZqio6Slpqeoqaqys7S1tre4ubrCw8TFxsfIycrS09TV1tfY2drh4uPk5ebn6Onq8fLz9PX29/j5+v/EAB8BAAMBAQEBAQEBAQEAAAAAAAABAgMEBQYHCAkKC//EALURAAIBAgQEAwQHBQQEAAECdwABAgMRBAUhMQYSQVEHYXETIjKBCBRCkaGxwQkjM1LwFWJy0QoWJDThJfEXGBkaJicoKSo1Njc4OTpDREVGR0hJSlNUVVZXWFlaY2RlZmdoaWpzdHV2d3h5eoKDhIWGh4iJipKTlJWWl5iZmqKjpKWmp6ipqrKztLW2t7i5usLDxMXGx8jJytLT1NXW19jZ2uLj5OXm5+jp6vLz9PX29/j5+v/bAEMACQkJCQkJEAkJEBYQEBAWHhYWFhYeJh4eHh4eJi4mJiYmJiYuLi4uLi4uLjc3Nzc3N0BAQEBASEhISEhISEhISP/bAEMBCwwMEhESHxERH0szKjNLS0tLS0tLS0tLS0tLS0tLS0tLS0tLS0tLS0tLS0tLS0tLS0tLS0tLS0tLS0tLS0tLS//dAAQACv/aAAwDAQACEQMRAD8AxqaaM00msD6EY1V2qZjUDGmQyu9VXqy5qq5pmMiq9VXqy5qq9BhIhNNpSabms2ZjxUoqEVKKkCUU8VGKeDVIY+kpM0VSEwpKM03NUiGFFJRVEn//0MHNMJpm6mlqxPfuDGoWNKzVCzUGbZG5qq5qVzVZzTMpMgc1Wc1K5qs5oMZEZNJmmk03NQ0ZNkwNSA1XBqQGpaGmWAaeDUANPBpoLk2aTNMzRmrQmx2aTNMzSZq0Q2PzSZpmaTNOxNz/0eT3U0tUG+ml6yse1zEpaoWamF6hZ6ZDYrNVZ2pWeqztTMmxrtVV2p7tVVmpMykwLUm6oS1N3Ucpi5FoNUgaqYepA9JxBSLganhqqB6cHqUiuYtbqN1V99Jvq0iXIn3Um6oC9ML1oomTmWN1G6q2+jearlJ5z//S8/8AMppkql5tIZamx6fMWi9RM9VjLUTS07EuROz1Wd6jaSq7PRYzch7vVdmppbNMoSOeU+wtJRRTMgpckUlFADw5p281FRSsO5NvNG81DS1SESbqN1R0VaJsSbqN1R0Uwsf/0/HfOpDKapZozVaG3tWWzLUZkqCkpXJdRkhemEk0lFIhybCiiigQUUUUAFFFFABRRRQAUUUUAFLSUU7gLRSUU7gf/9Tw6iiigAooooAKKKKACiiigAooooAKKKKACiiigAooooAKKKKACiiigD//1fDqKdtNJg0DsxKKXFJQIKKKKACiiigAooooAKKKKACiiigAooooAKKKKACiiigD/9bxzy6Ty6v7KaUpXO7lM8pTClaBSomSi5LgigVptW2SoWWmYSp9iGilIxSUGQUUUUAFFFFABRRRQAUUUUAFFFFABRRRQB//1/M9tNK1YxSEVmenYqlaiZatkVEwpktFNlquy1eYVXcVSM2ikwqKrLCoGFUc00MooopGYUUUUAFFLRQAlFOooAbRTqKAG0UtFAH/0PPcU0in001keqRkVCwqc1E1MlldhVdxVlqrvVIzZUcVA1WHqu1WjnmR0lLSUGAUUUUALTqSnUhCUUtFIQlFLSUAJRS0UDP/2Q==",
      title: "Bukalapak",
    },
  ];

<Image
    src={featuredWorks[0].img}
    quality={100}
    alt={featuredWorks[0].title}
    placeholder="blur"
    blurDataURL={featuredWorks[0].imgBlur
    width="608"
    height="620"
    }
/>
I personally use https://blurred.dev a BlurHash data url generator. But if you need more customization or you need to run the blurhash encode and decode process on your web production state you can take a look at the documentation here.
Reference: https://github.com/woltapp/blurhash
You can find me on
Twitter: https://twitter.com/mlven23
GitHub: https://github.com/melvnl
LinkedIn: https://www.linkedin.com/in/melvin-liu/
Note: If you have any questions, you can leave a message below by Sign In with your GitHub account 😉